To enable Keliweb CDN in your WordPress, you can use several cache plugin provided by the community. Here is a short list of the most popular ones.
The CDN resource we're using in our guide is wwwkeliwebit272925.stackpathcdn.com with the related website www.keliweb.it. In your website's settings please enter your own CDN resource and your domain name.
W3 Total Cache
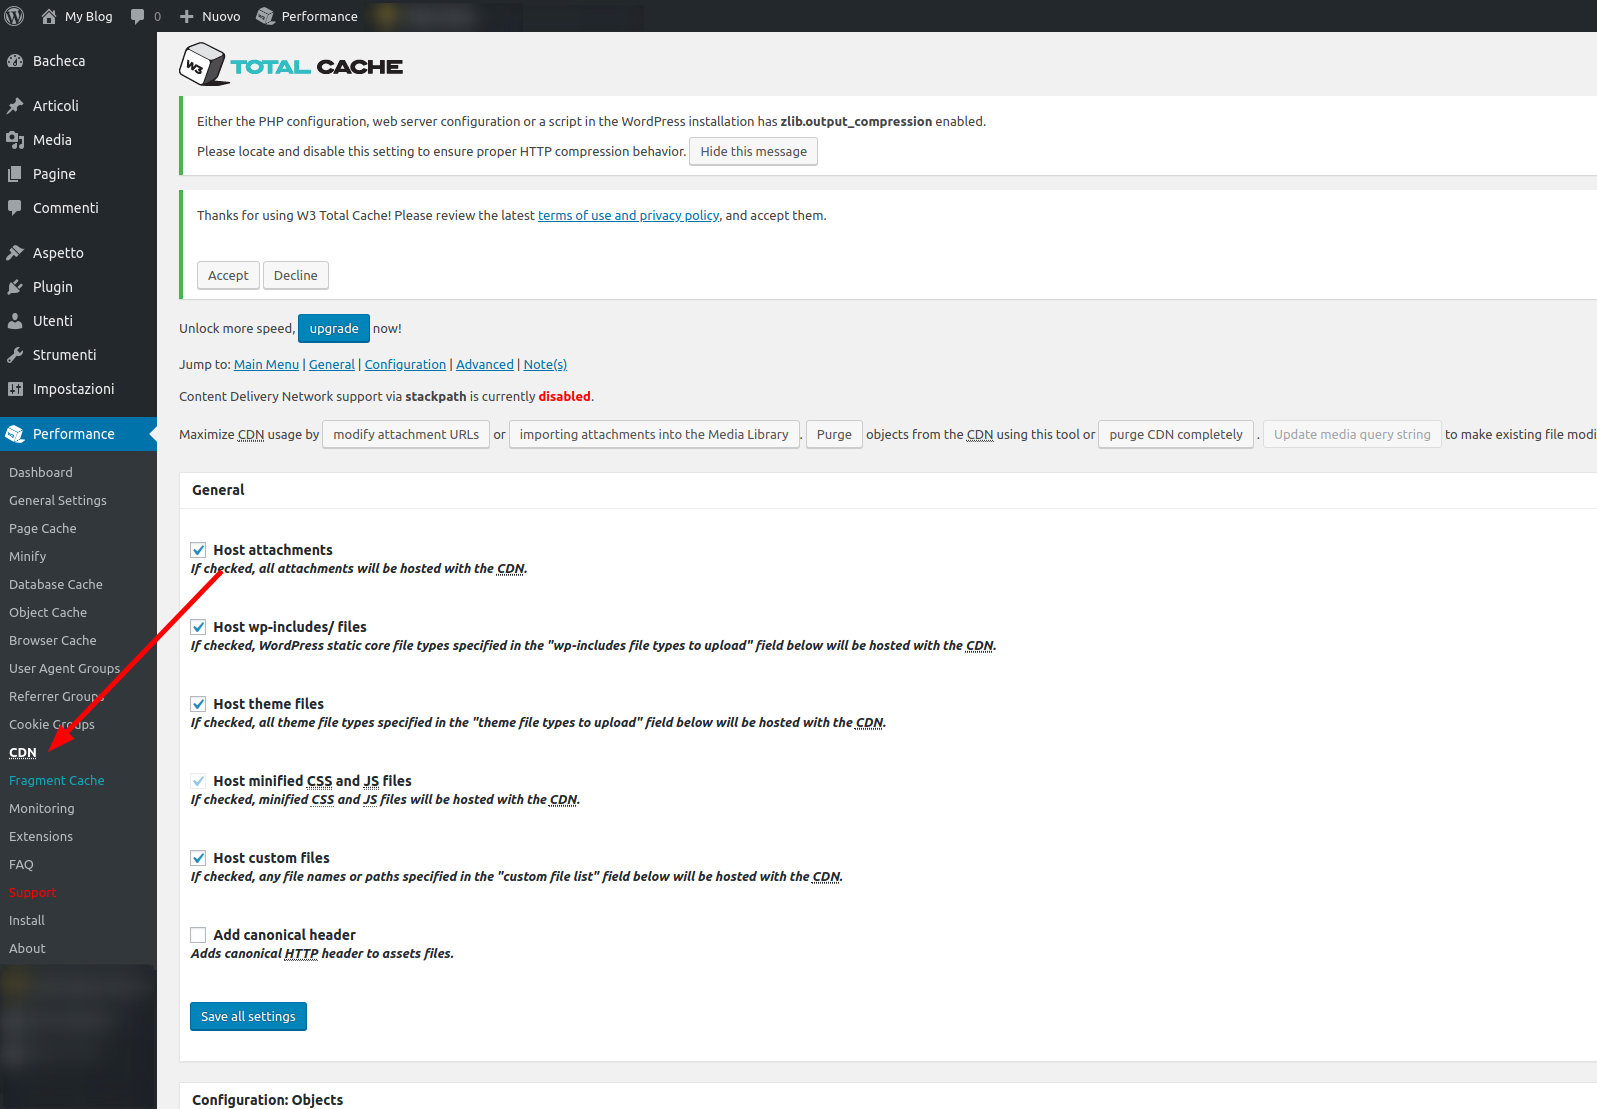
To enable your CDN go to "Performance", click on "General Settings" and select "CDN".
Then follow the procedure below:
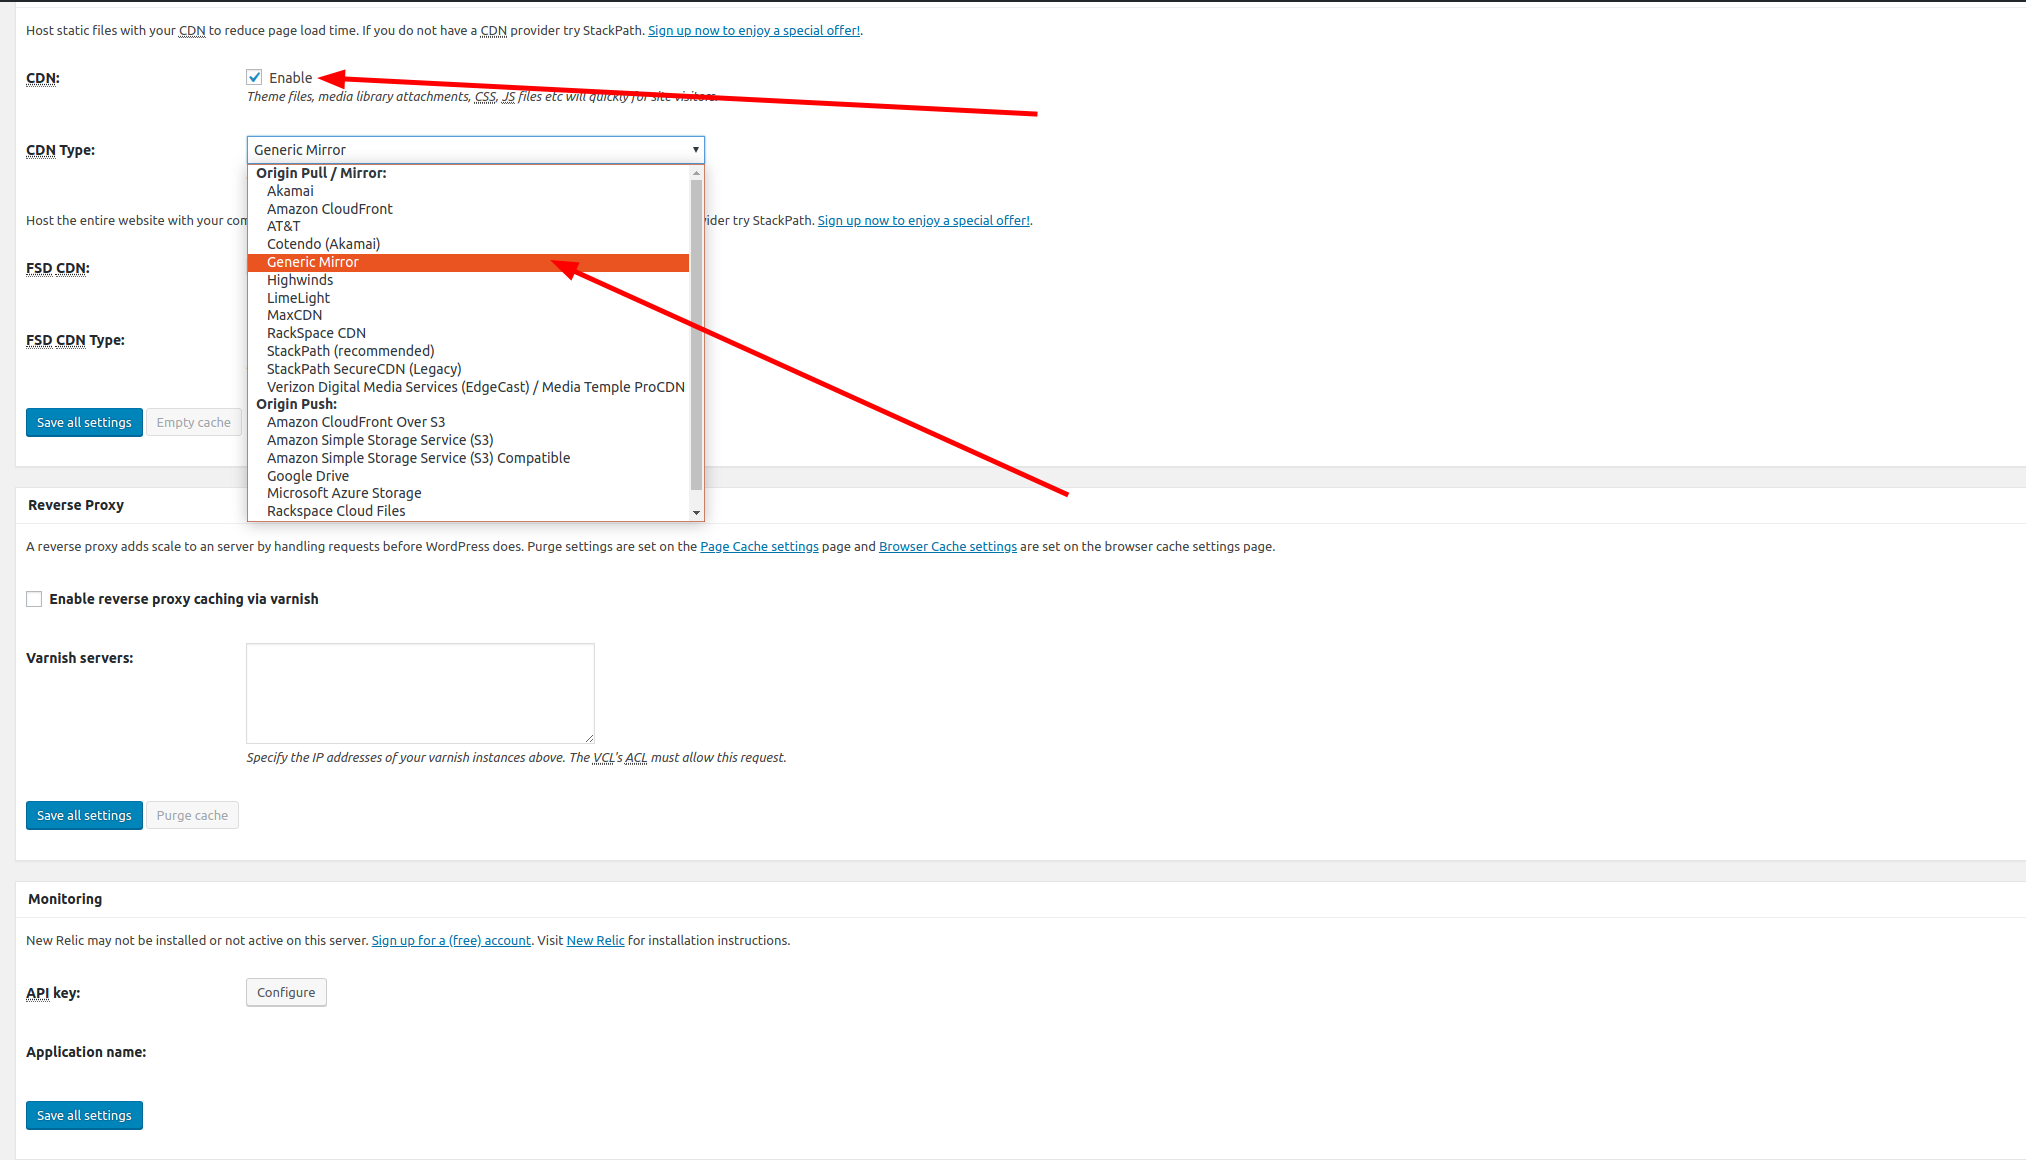
- Enable CDN by putting a flag on the dedicated box
- Choose as CDN type: Generic Mirror
- Save settings
- Click, in the "Performance" section in the menu, on "CDN", to configure your CDN resource
- Type your resource (in our example wwwkeliwebit272925.stackpathcdn.com)
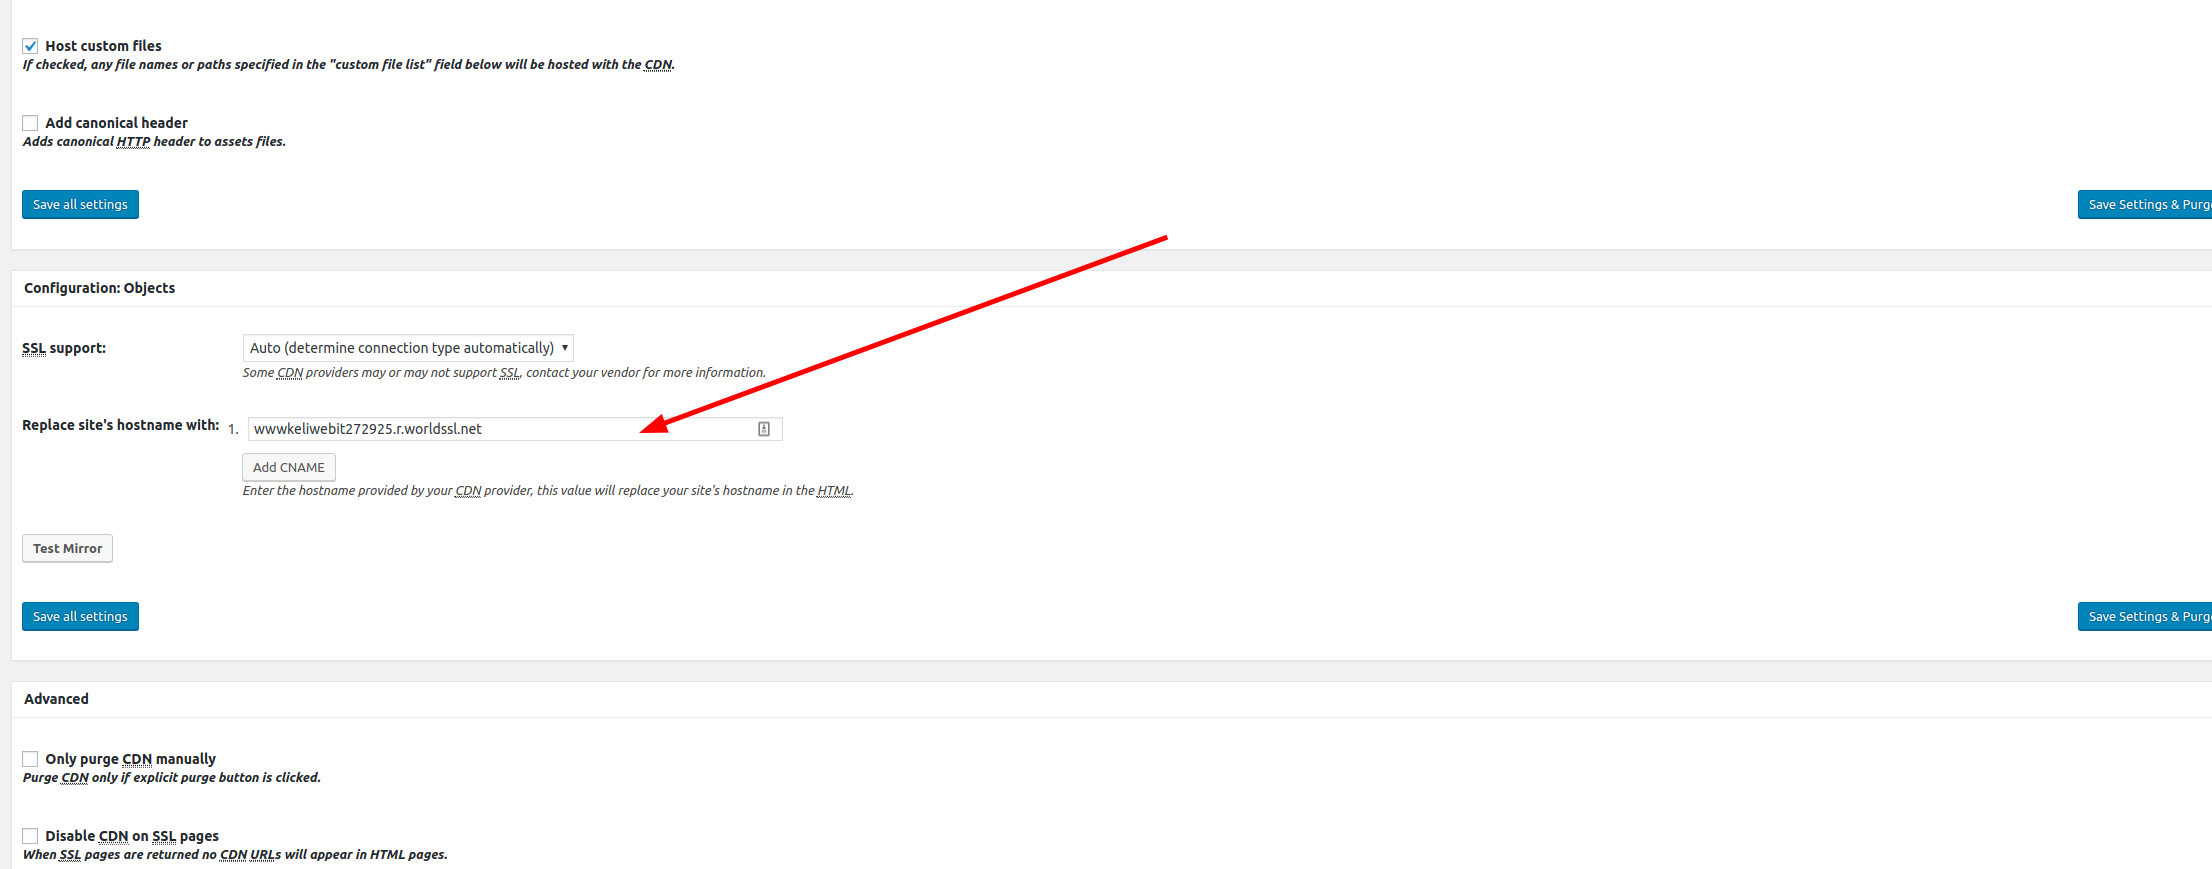
- Save changes and empty cache
WP Fastest Cache
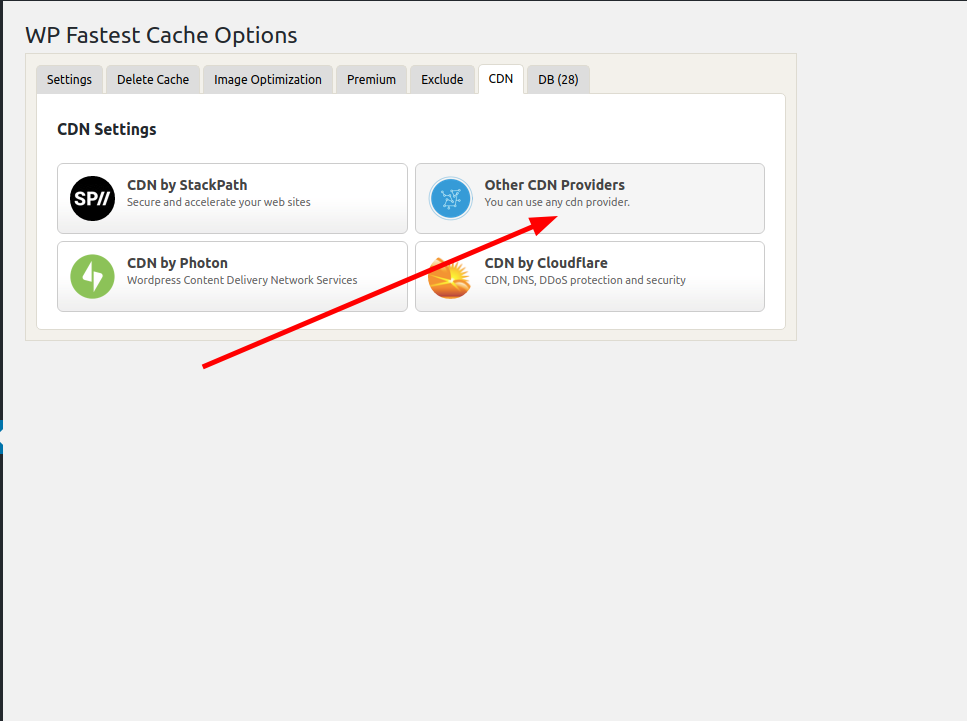
Select "CDN" in the plugin settings and follow the procedure below:
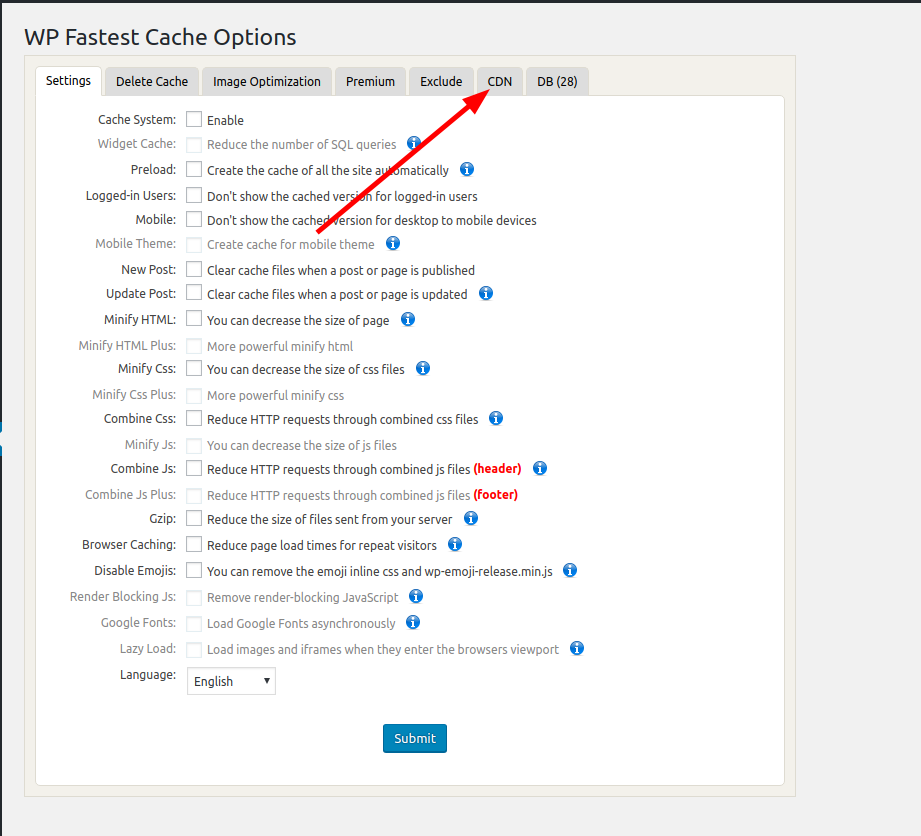
- Choose "Other CDN Providers"
- Enter in "CDN Url" field your CDN resource's name (ex. wwwkeliwebit272925.stackpathcdn.com)
- Enter your domain name (in our example www.keliweb.it) in "Origin Url" field
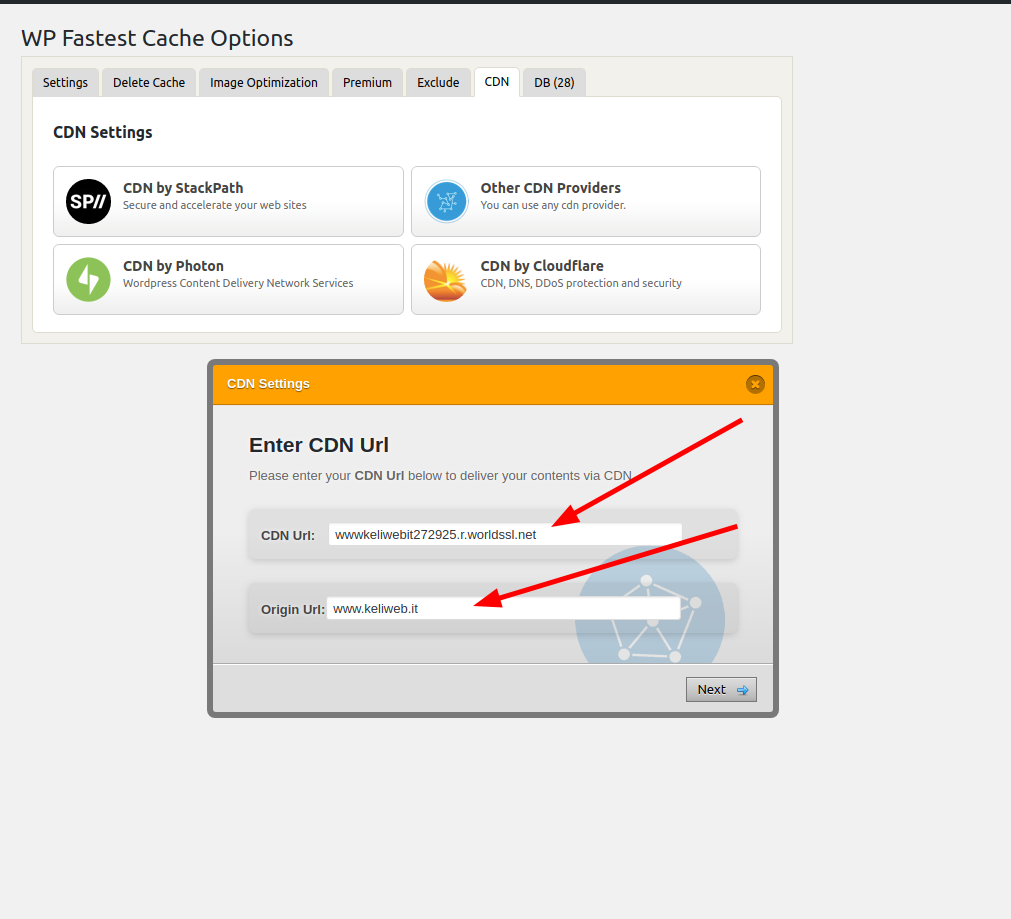
- Continue and click on "Finish" to end the procedure
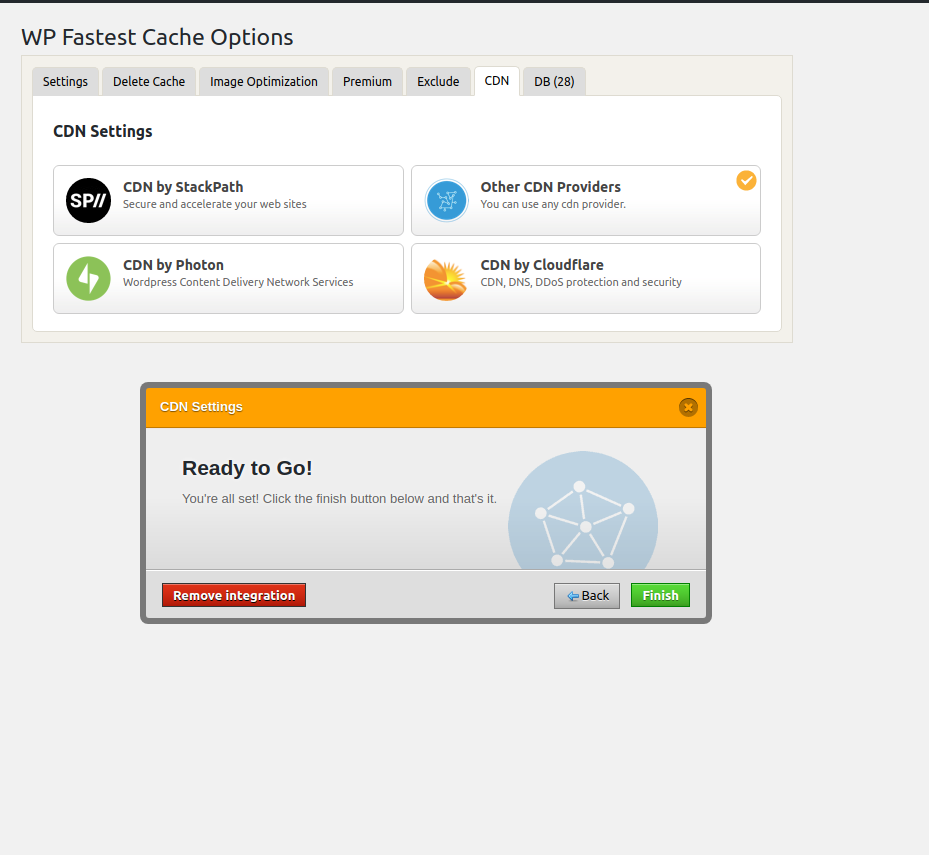
- Empty cache
At this time, you should perform another speed test by using Google Page Speed and Pingdom Tools.
Compare the before and after tests and note that it can take one to seven days for your site to reflect the performance improvements of a CDN.