Our Mail Server solution allows you to manage your e-mails with no restrictions in terms of outgoing or incoming mail. This is the best solution for all professionals and individuals in need of managing newsletters or campaigns in full autonomy.
Unlike a shared hosting solution, which sets its mail limit to 180 per hour, this solution is not submitted to any restriction and provides you with a dedicated IP.
When you buy a Dedicated Mail Server, you are immediately provided with a cPanel control panel to manage your mail. If you already have a hosting on which you've already configured your domain and website, you will deal with two separate cPanel control panels: one to manage your website and the other one to manage your e-mails.
To make sure that your e-mails are managed at their best, you need to configure DNS correctly. Before updating DNS, make sure to recreate all mailboxes in the new Server Mail cPanel: otherwise several problems may occur later. Then configure all mailboxes in the client you're currently using and download all e-mails to save them locally. Otherwise you can buy our dedicated advanced support.
Configure your DNS following a simple procedure:
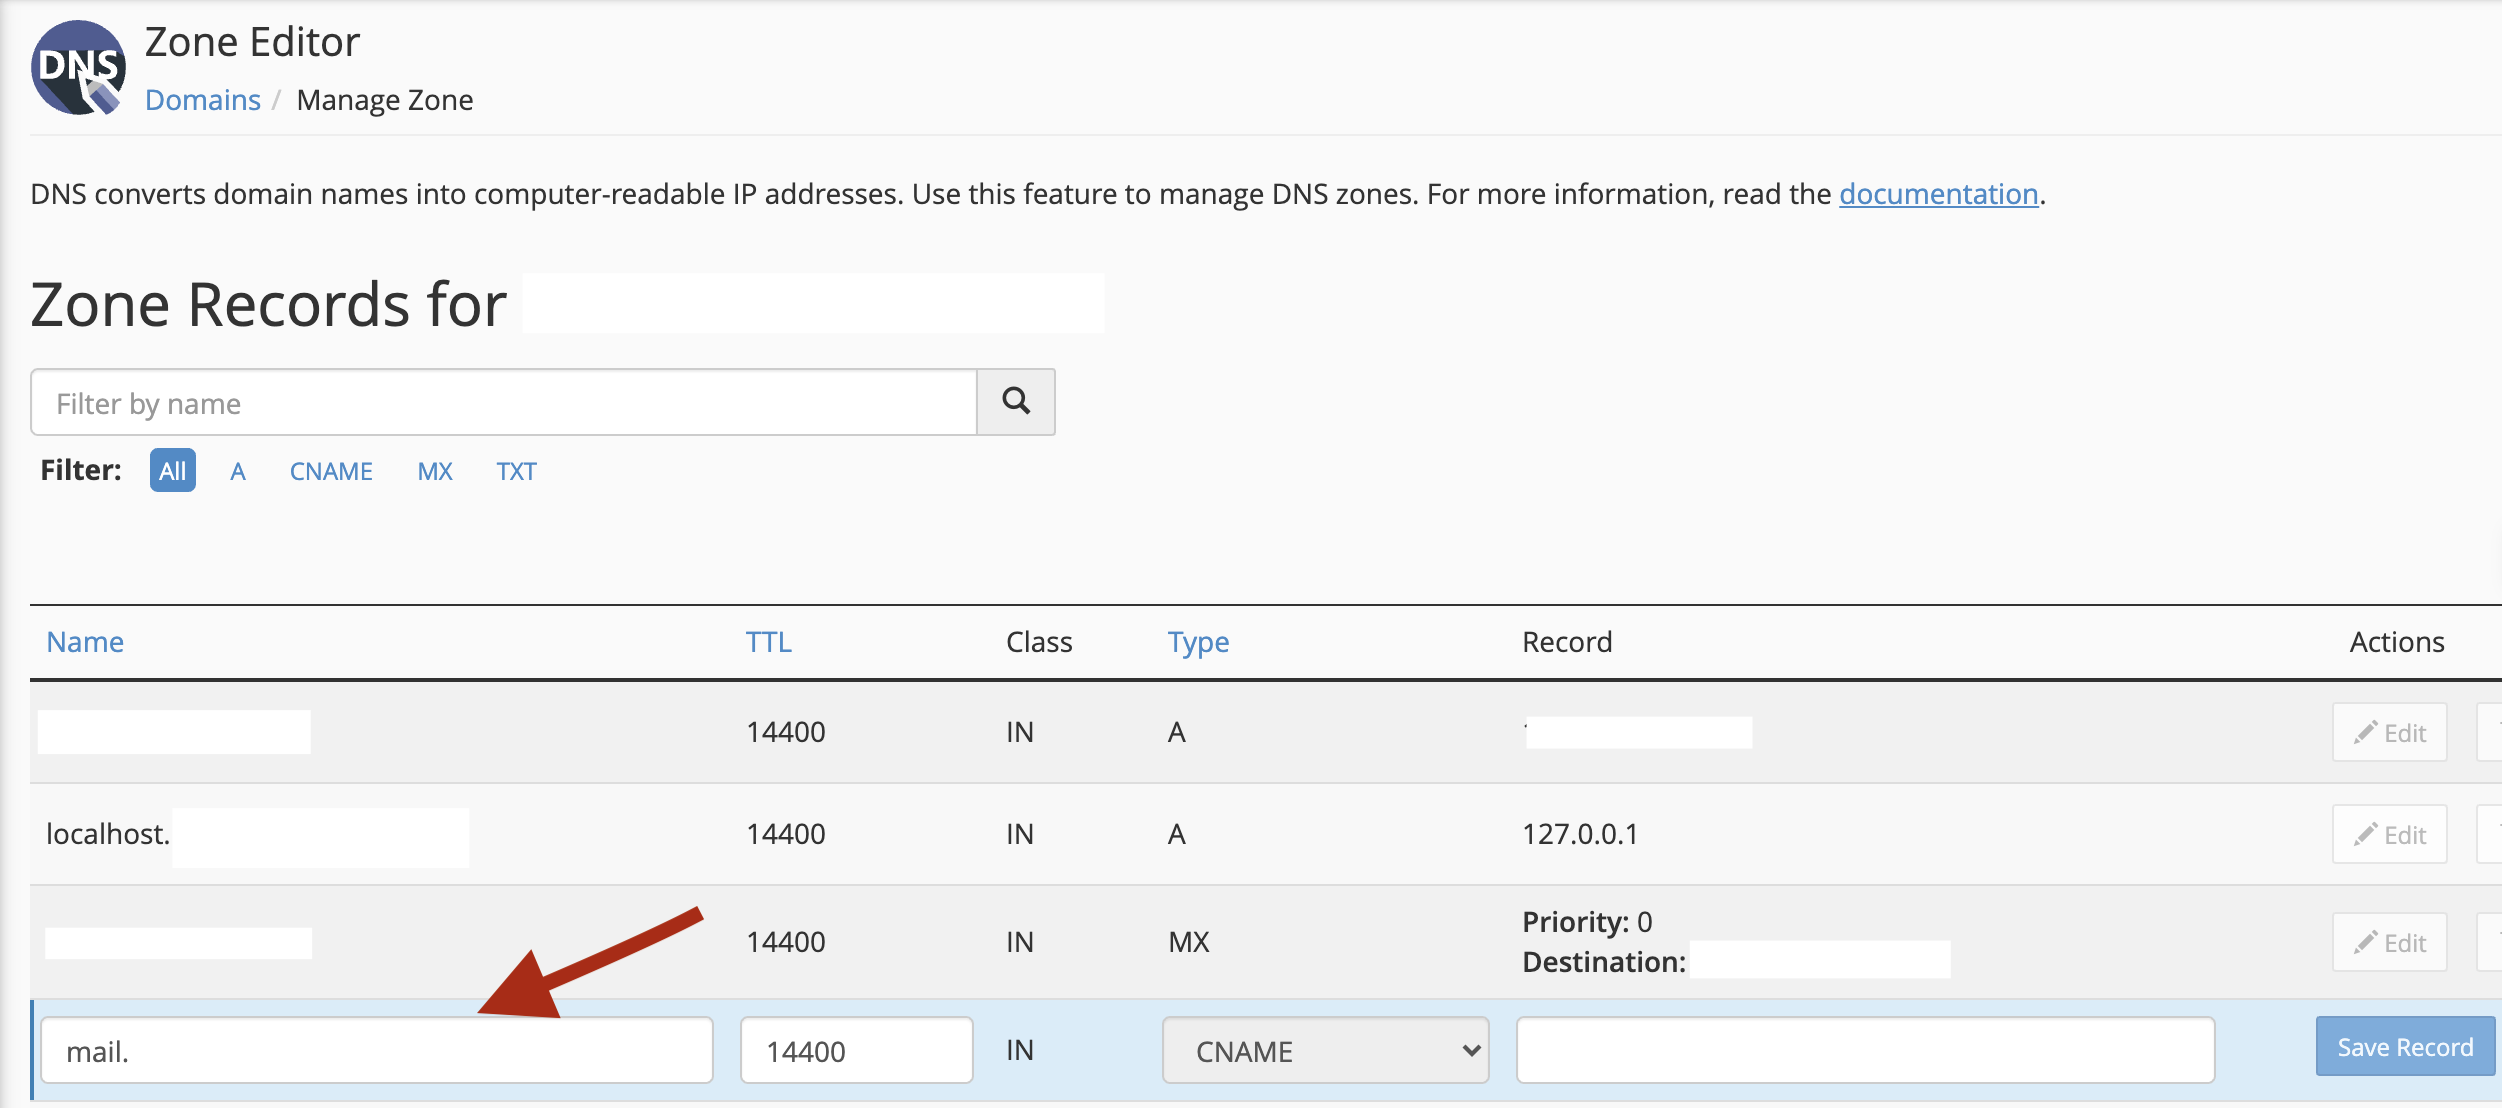
- Check the activation e-mail and look for your dedicated IP. Log into your cPanel and click, in the "Domains" section, "Zone Editor"

- Select the CNAME record to turn it into A Record, entering the IP address we provided you and click "Edit"

- Repeat the same operation for the webmail record, to check your webmail in the dedicated server: webmail.domain.ext
- Save all and click on "Save record"
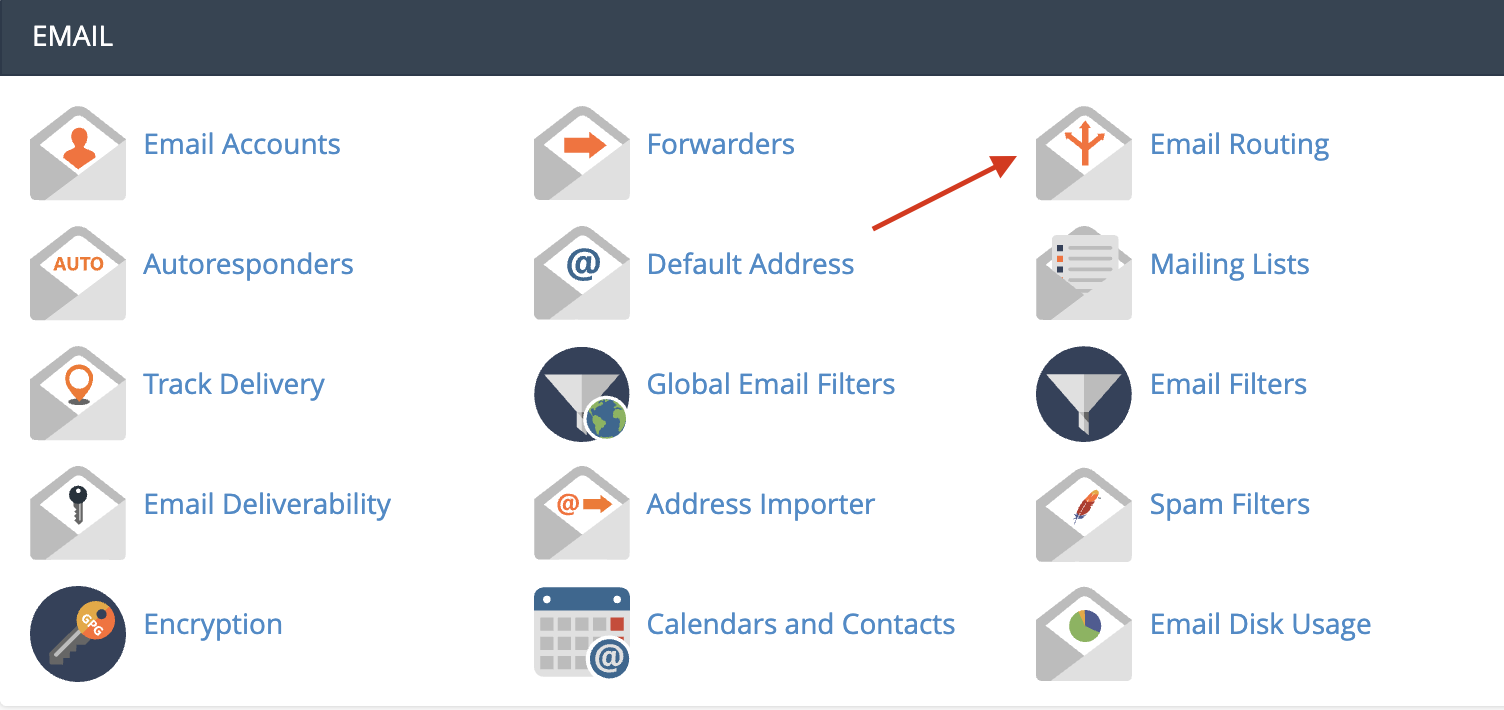
- Go back to your dashboard and, in the "Email" section, click "E-mail routing"

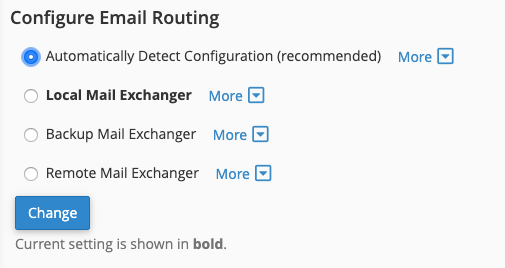
- Select "Automatically Detect configuration: Local (recommended)". Click on "Change" and modify the MX record, turning it into mail.mydomain.com

If the operation has been successfully processed, your e-mails will be managed in the new Dedicated Mail Server.
For further information or support, please contact our team via ticket system, from your customer area.


